This is an overview of a project I did a while ago, where the goal was to successfully track shapes in a video using only classical computer vision methods. The task was to track the shapes from the moment they entered into the picture frame, to the moment they disappeared from the frame. Sounds trivial, but there were a couple of tricky parts. The shapes dispread randomly for a (couple of) frame(s), the shapes also moved over each other, sometimes completely abstracting one another. All of this would be trivial using ML methods, but with traditional CV, we have to use a bunch of algorithms to achieve this. It’s also not that complicated, we just have more code to stick together to achieve the same. But the bonus point is the speed this algo works in real time (much faster than the frame rate of the video). I will now walk you over the process.
But first, bellow is the video of the finished result.
Overview of the main code
Before we start going through the methods I used, let’s check the flow of the main code.
- First we have to detect the shapes in the image,
- then we “track” those shapes (save their current position, match them with their previous id etc.),
- and after that we visualize our tracking info on the image (bounding boxes + a line path).
This post will also be broken into 3 sub chapters:
Main loop:
if __name__ == "__main__":
    cap = cv2.VideoCapture("video.mp4")
    frameShape = (int(cap.get(cv2.CAP_PROP_FRAME_HEIGHT)), int(cap.get(cv2.CAP_PROP_FRAME_WIDTH)))

    tracker = ShapeTracker(frameShape)

    allTimes = np.empty(0)

    while cap.isOpened():
        ret, frame = cap.read()
        if not ret:
            break

        frame_num = cap.get(cv2.CAP_PROP_POS_FRAMES)
        # Detect shapes
        detected_shapes = tracker.detect_shapes(frame)

        # Track shapes
        tracker.track_shapes(detected_shapes)

        # Draw the bounding boxes
        tracker.draw_bounding_boxes(frame)

        # Draw the tracked paths
        tracker.draw_paths(frame)

        # Show the frame
        cv2.imshow("Shape Tracking", frame)

        # Exit if 'ESC' is pressed
        if cv2.waitKey(1) & 0xFF == 27:
            break

    cap.release()
    cv2.destroyAllWindows()
Shape Detecting
The first method called is detect_shapes(frame). Let’s see what’s inside.
Contour detection
First thing we do is contour detection.
detected_shapes = []
contours = []

frame_gray = cv2.cvtColor(frame, cv2.COLOR_BGR2GRAY)

if len(self.tracked_colors) > 0:
    # If we have detected shapes, threshold the image based on the shapes colors
    frame_gray, contours = self._threshold_colors(frame, frame_gray)

contours.extend(self._threshold_grayscale(frame_gray))
On the first run, we won’t have any prior contours saved in the attribute self.tracked_colors, so the _threshold_grayscale() function will be triggered.
def _threshold_grayscale(self, frame_gray)->list:
    blurred_img = cv2.GaussianBlur(frame_gray, (5, 5), 0)
    # Threshold the image
    binary_img = cv2.adaptiveThreshold(blurred_img, 255, cv2.ADAPTIVE_THRESH_GAUSSIAN_C, cv2.THRESH_BINARY, 11, 1)

    kernel = cv2.getStructuringElement(cv2.MORPH_RECT, (2, 2))
    cleaned_binary = cv2.morphologyEx(binary_img, cv2.MORPH_CLOSE, kernel)

    # https://stackoverflow.com/questions/66924925/how-can-i-remove-double-lines-detected-along-the-edges
    cv2.floodFill(cleaned_binary, mask=None, seedPoint=(int(0), int(0)), newVal=(255))
    cv2.floodFill(cleaned_binary, mask=None, seedPoint=(int(0), int(0)), newVal=(0))

    # Find contours
    contours, _ = cv2.findContours(cleaned_binary, cv2.RETR_EXTERNAL , cv2.CHAIN_APPROX_SIMPLE)

    return contours
Before doing the contour searching, we have to prepare the frame. First we run it through a gaussian blur using a 5x5 kernel. Gaussian blurr removes some of the noise in the image. This is also reccomended in opencv docs. But the results without the blurr were also good in my case as the scene was quite simple.

Grayscale Version
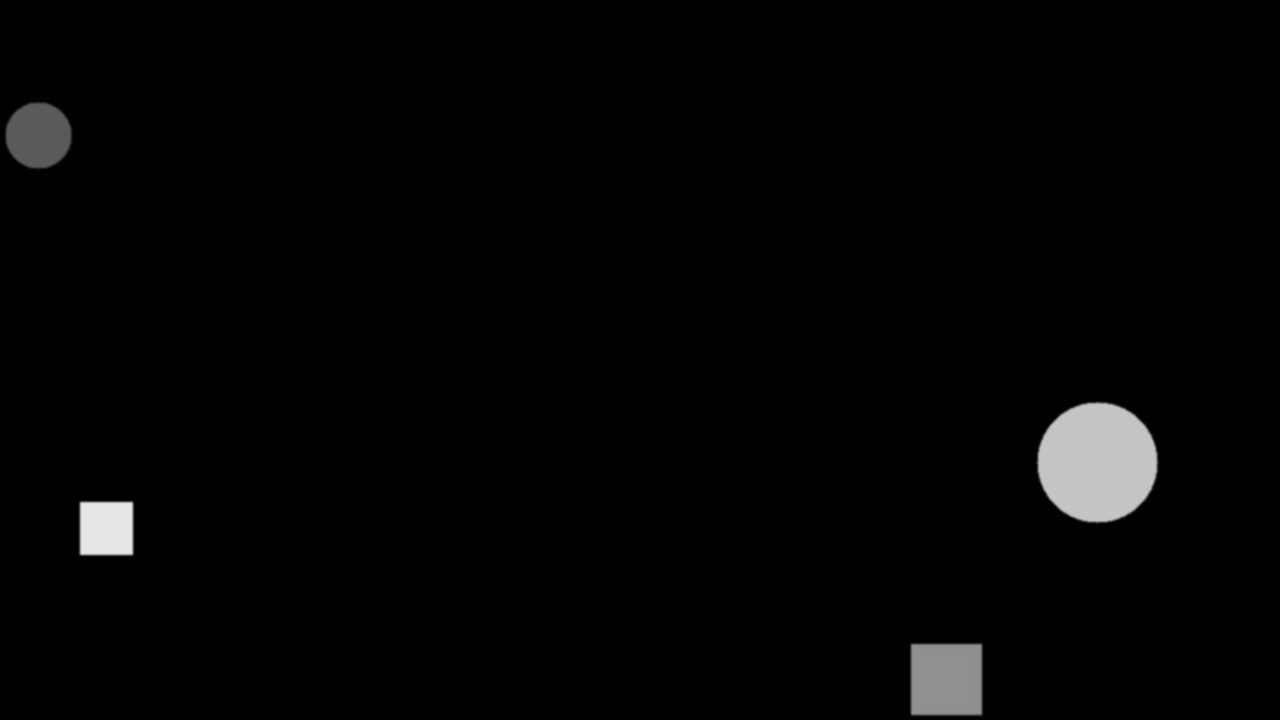
Blurred Effect
Blurred frame is then inputed into the threshodling function, followed by some morphological closing. But as you can see in the image bellow, the result is not perfect to say the least.
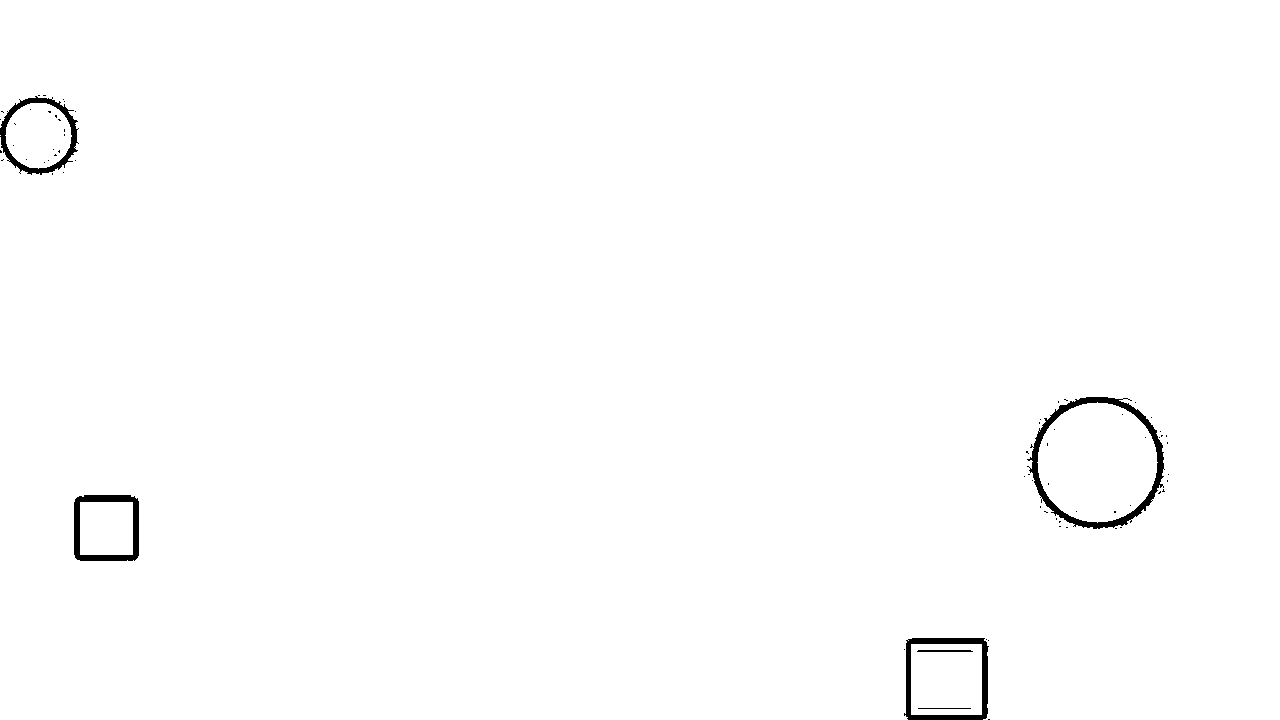
Binary image
I found this stackoverflow post, where somebody was facing a similair problem. ( Link ). The solution is to use floodFill functions, two times one after another. So first we fill the backgroud with white color and then with black color.
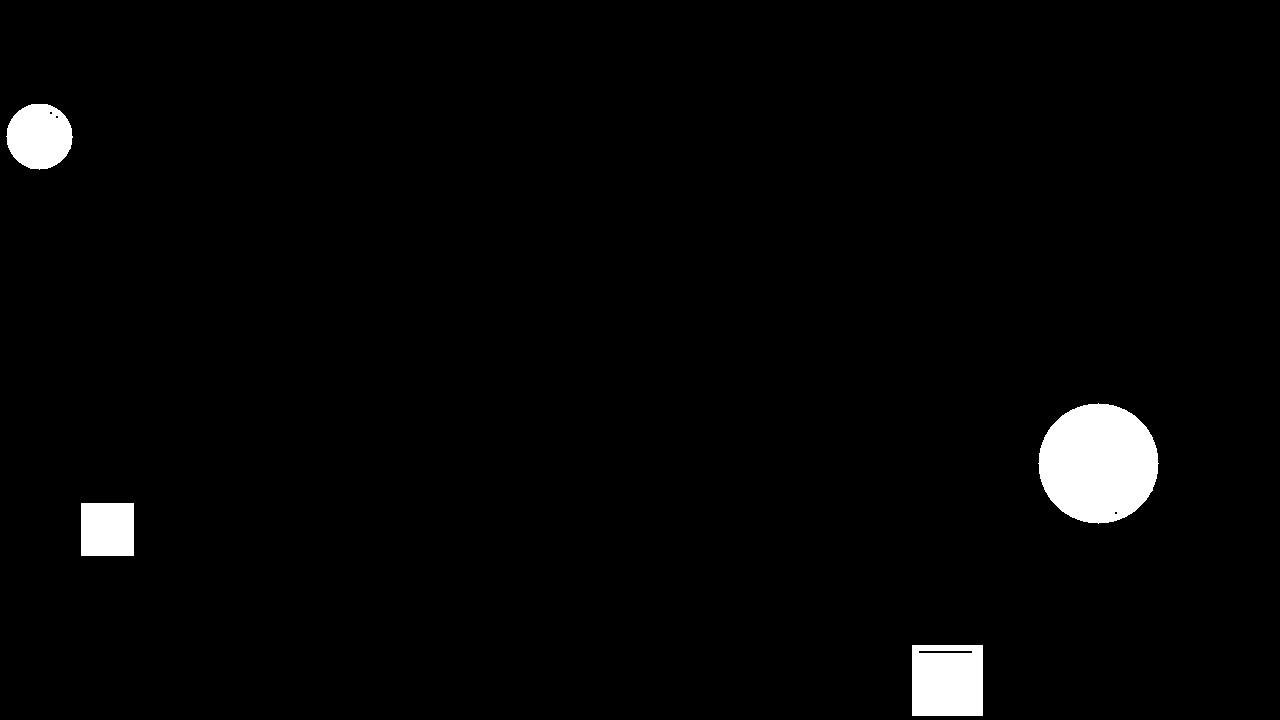
Binary image
After that, the findContours works flawlessly. The returned contours are then ‘extended’ with additional data like it’s moments, color, shape, area and perimeter.
Shape Tracking
When we have a list of detected shapes we can go on with shape tracking. Before I go to the actual code of the shape tracking, let’s have a quick look at the Kalman filter algorithm and how it’s used in our case.
Kalman Filter
In general, Kalman Filter is an algorithm that tracks the past states of a system and estimates the next state based on the info it has on the previous ones. Each new discrete step, the filter gets updated with the current value/state of the system, thus adjusting the calculation of the next state estimation.
In statistics and control theory, Kalman filtering (also known as linear quadratic estimation) is an algorithm that uses a series of measurements observed over time, including statistical noise and other inaccuracies, to produce estimates of unknown variables that tend to be more accurate than those based on a single measurement, by estimating a joint probability distribution over the variables for each time-step. The filter is constructed as a mean squared error minimiser, but an alternative derivation of the filter is also provided showing how the filter relates to maximum likelihood statistics.1

Kalman Filter Loop
In our case, when a new shape is detected in a new frame, we initialize a fresh ‘Shape’ object with it’s parameters like center, area color etc. Each shape object also has an instance of OpenCV’s Kalman Filter. Immediately, we update it with the current state (aka. center position) of the shape. The main reason I decided to use Kalman filter were the missing shapes between some frames. In some cases the shape disappears for a couple of frames and the reapers back on a new position. The ‘new’ positon it reapers on is the position it was heading towards to. So I’m using Kalman filter to predicts the direction and new positions during those frames where the shape is missing.
# (x, y, dx, dy) for 4 states, (x, y) for 2 measurements
self.kf = cv2.KalmanFilter(4, 2)
.
.
.
# Initial update with the starting center position
self.kf.predict()
self.kf.correct(np.array([center[0], center[1]], dtype=np.float32))
Shape object also has two simple functions prepared, update & predict. Update is used in each new frame where we detect the same shape. Predict on the other hand is used on those frames where the shape is missing from the captured frame.
Update first calls predict(), just to populate the kf object with a new predicted value (honestly I’m not sure / don’t remember if this was really needed 🤷♂️). After that, it updates kf with the actual measured value of the center, then we just update the shapes center and path with the actual measured values. Missing frames are always reset to 0 if we call update, because this means that we see the shape on the current frame.
Predict calls only the predict() function and uses the predicted state to update the current center of the shape.
def update(self, new_center):
    """Update the Kalman filter with a new center."""
    self.kf.predict()
    self.kf.correct(np.array([new_center[0], new_center[1]], dtype=np.float32))
    self.center = new_center
    self.path.append(new_center)
    self.missing_frames = 0  # Reset missing frames

def predict(self):
    """Predict the next position of the shape using Kalman filter."""
    self.kf.predict()
    predicted_center = (int(self.kf.statePost[0, 0]), int(self.kf.statePost[1, 0]))
    self.center = predicted_center
In the case of the first flow, we get the predicted value and the measured value on the picture bellow at state k. The measured value gets of course fed to the algorithm to correct the next prediction in state k + 1. Second flow, when calling only the predict function, we get only the predicted shape on the image, as we called the predict because we hadn’t detected the shape on the current frame. In this case, Kalman filter is not updated with the measured state, and we can only hope that the shape reapers quickly over the next n frames and that in the meantime the algorithm can predict values that ar close to the actuall ones, so once the shape reapers, we can successfully identify it as the old shape.

Shape tracking and predictions
Shape tracking logic
The whole tracking code can be roughly broken into two main parts:
- Handle the list of detected shape
- Handle the list of missing shapes that were detected in the previous n frames
1. Handle the list of detected shape
First we try to match the freshly detected shapes in the new frame with the old list of shape objects, thus only updating the position of an old shape. As this is the main goal, to track the same shape from the moment it appears on the frame to the moment it goes off the frame.
We do this simply by calculating the color difference and the position difference. If bellow some threshold, we count it as the same shape.
for shape in detected_shapes:
  cx, cy = shape["center"]
  matched_id = None

  # Try to match this shape with existing tracked shapes
  for shape_id, shape_obj in self.tracked_shapes.items():
      # Calculate the Euclidean distance between the centers of the shapes
      dist = np.sqrt((cx - shape_obj.center[0]) ** 2 + (cy - shape_obj.center[1]) ** 2)

      # Check color difference in hsv space
      tracked_color = self.tracked_colors[shape_id]["hsv"].astype(np.int16)
      color_diff = np.linalg.norm(shape["color_hsv"].astype(np.int16) - tracked_color)

      if dist < 300 and color_diff < 10:
          matched_id = shape_id
          break
After shape matching we again have two possible flow, either the shape is old and just has a new position or we detected a new shape on the video. In the case of the first flow, we just update the old shape with the new shape info (center, bbox and perimeter). With this, the Kalman Filter update function get’s also called. And in the second flow, we got a new shape, meaning tht we have to initialize a new Shape object.
if matched_id is not None:

    # Update the Kalman filter and tracked shape
    shape_obj = self.tracked_shapes[matched_id]
    shape_obj.update((cx, cy))
    shape_obj.perimeter = shape["perimeter"]
    shape_obj.bbox = list(shape["bbox"])
    new_tracked_shapes[matched_id] = shape_obj

    del self.tracked_shapes[matched_id]
    del unmatched_tracked_shapes[matched_id]
else:
    # Assign new ID and create a new shape object with Kalman filter
    self.next_shape_id += 1
    new_shape = Shape(self.next_shape_id,
                      (cx, cy), shape["area"],
                      shape["perimeter"],
                      list(shape["bbox"]),
                      shape["color_hsv"],
                      shape["shape_type"])
    new_shape.trace_color = self._random_color()
    new_tracked_shapes[self.next_shape_id] = new_shape

    # Store HSV color and precomputed bounds
    lower_bound, upper_bound = self._calculate_hsv_bounds(shape["color_hsv"], 4)
    self.tracked_colors[self.next_shape_id] = {
        "hsv": shape["color_hsv"],
        "bounds": (lower_bound, upper_bound)
    }
2. Handle the list of missing shapes that were detected in the previous n frames
If we are here, it means that during the shape matching step, some old shapes were left without a match with the newly detected shapes. First we define the max missing frames we are willing to still track this shape. Remember, that the update() function resets the missing frames value to 0. The max missing frames number can be different based on the last possition of the shape. If it’s near the edge, chances are it actually went off the frame, so we define a shorter window we are willing to wait for the shape to reaper. The value here, 5 and 15 are just from trying and seeing what works best.
Then we have 2 possible flows again :). If the missing frames are still in the windows of max missing frames we call the predict() function (if we have enough detected values for the Kalman Filter to reliably work)
The other flow just deletes the shape if it has been missing for more than max allowed frames.
# Handle missing shapes (objects not detected in the current frame)
for shape_id, shape_obj in unmatched_tracked_shapes.items():
  # If the shape is not at the edge of the frame, allow more missing frames
  max_missing_frames = 5 if self._is_at_edge(shape_obj.bbox) else 15

  if shape_obj.missing_frames < max_missing_frames: #
      if len(shape_obj.path) > 5: # Kalman filter need a few frames to predict the position, otherwise it will be too inaccurate
          shape_obj.predict()  # Get predicted position using Kalman filter
      else:
          shape_obj.update(shape_obj.center) # Update the shape with the same position if we don't have enough frames
      shape_obj.missing_frames += 1
      new_tracked_shapes[shape_id] = shape_obj

  else:
      # Remove the shape if it's missing for too many frames
      del self.tracked_colors[shape_id]
Visualization Part
I prepared 2 visualization functions, draw_paths() and draw_bounding_boxes(). Both use OpenCV functions to draw the geometric shapes. The code is, I think quite self explanatory.
def draw_paths(self, frame):
  for _, shape in self.tracked_shapes.items():
    path = shape.path
    color = tuple(map(int, shape.trace_color))

    for i in range(1, len(path)):
        cv2.line(frame, path[i - 1], path[i], color, 4)

    cx, cy = shape.center
    cv2.circle(frame, (cx, cy), 5, color, -1)

def draw_bounding_boxes(self, frame) :
  for shape_id, shape in self.tracked_shapes.items():
    if shape.missing_frames == 0:
        x, y, w, h = shape.bbox
    else:
        x, y, w, h = shape.get_bbox()

    cv2.rectangle(frame, (x, y), (x + w, y + h), (0, 255, 0), 2)
    cv2.putText(frame, f"[{shape_id}] {shape.type}", (x, y - 10), cv2.FONT_HERSHEY_PLAIN, 1.0, (0, 255, 0), 2)
And that’s it basically. You can find the complete code at my Github:
-
https://en.wikipedia.org/wiki/Kalman_filter ↩